ℹ️ Before you begin
You'll need administrator access to your Rock RMS instance with permission to manage Security settings. Keep a Safe Pathways tab open as well — you'll paste your API key there in Step 2.
Part 1
Generate a REST API key
This key is what allows Safe Pathways to securely connect to your Rock RMS data.
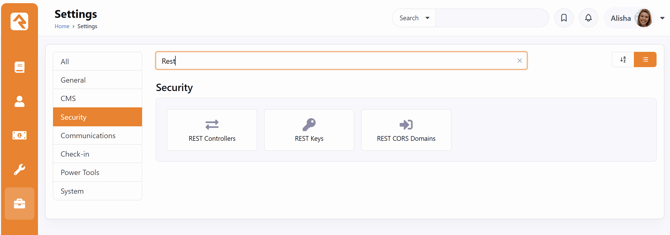
1. Open REST Keys andaddanewkey
In Rock RMS, go to Security and click REST Keys. Then click the + in the top-right corner to add a new key.
2. Name the key, set it to Active, and generate it
Enter a Name for the key, set the status to Active, then click Generate Key. Copy the generated key and paste it into Safe Pathways — this is what links the two systems.
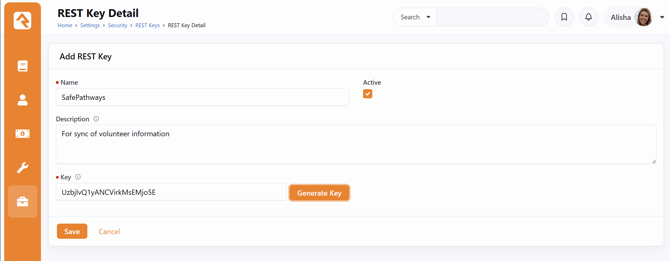
Tip: copy the key right away — Rock only shows it once. If you lose it, just generate a new one.
Part 2
Grant REST controller permissions
Your new key needs access to four controllers. Each one follows the same pattern: search for it, open its lock (security) settings, set the access level, then add your key's user.
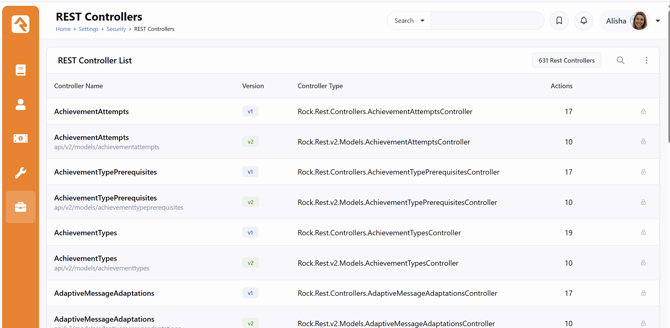
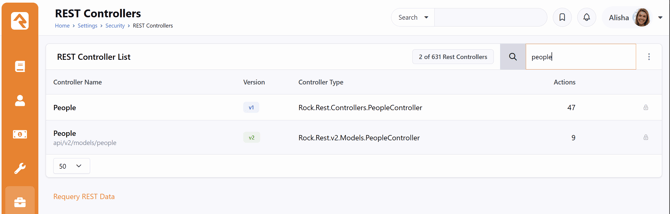
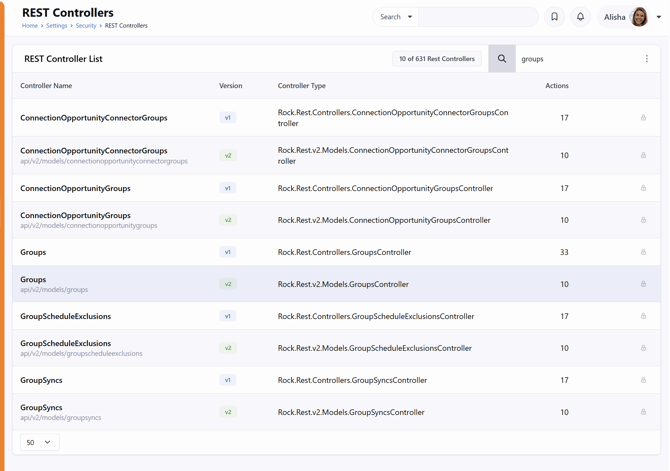
3. Open REST controllers
Go back to Security and select REST Controllers.
4. Add your user to each of these four controllers
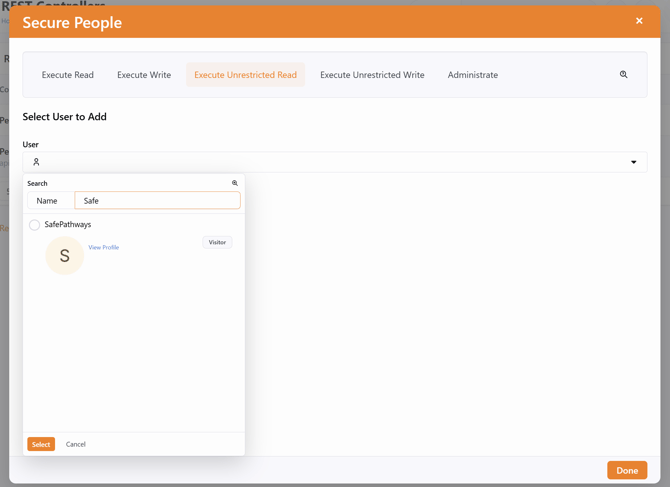
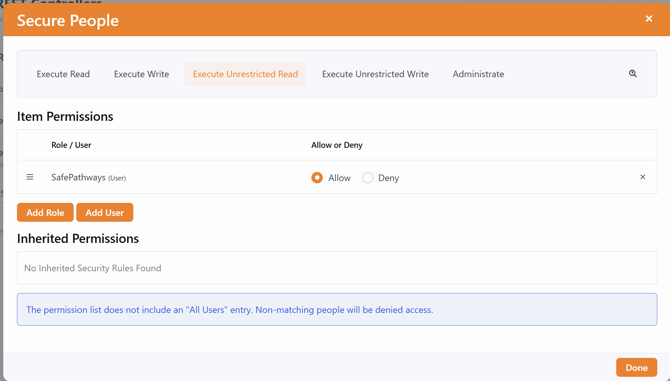
For each controller below: search for it, click the lock icon on the right, set the access level shown, click Add User, and search for the name you used when creating the key. Select the user, click Add, then click Done.
People v2
Search for People v2, open the lock, enable Execute Unrestricted WRITE, then add your user.
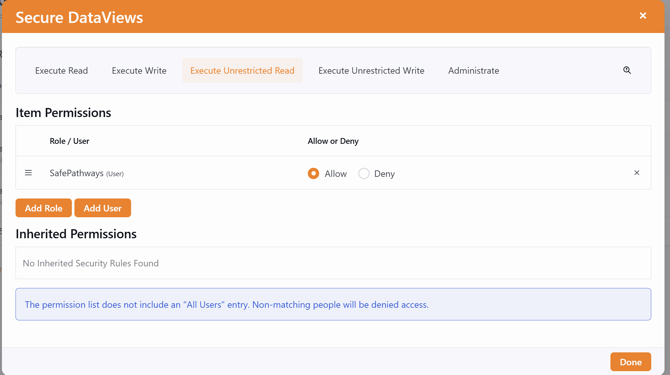
Dataview
Search for Dataview and follow the same steps to add your user again.
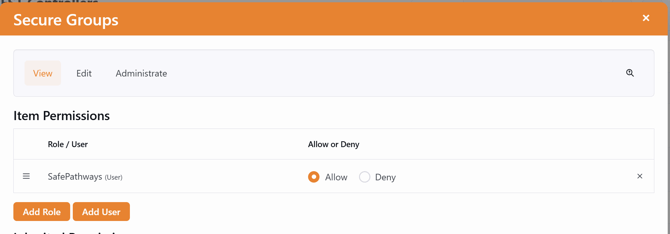
Groups v2
People v2, open the lock, enable Execute Unrestricted WRITE, then add your user
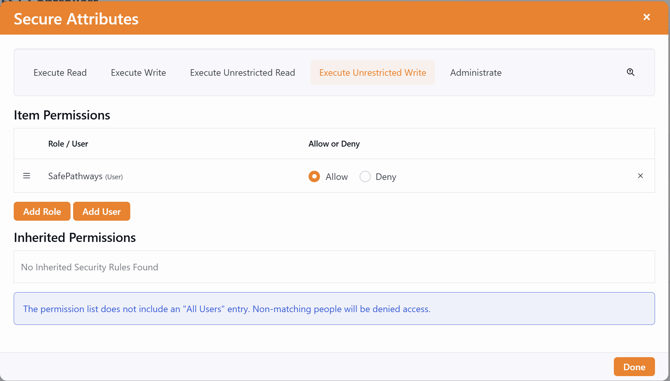
Attributes v2
Search for Attributes v2, enable Execute Unrestricted Write, and add your user.
People v2 — set Execute Unrestricted WRITE and click Add User.
Search for the key's name, select the user, and click Add.
Click Done, then search REST Controllers for the next one — Dataview.
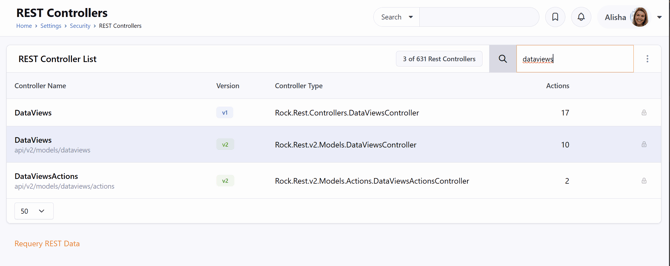
Dataview — repeat the add-user steps.
Groups v2 — select View.
Add your user to Groups v2.
Finally, search for Attributes v2.
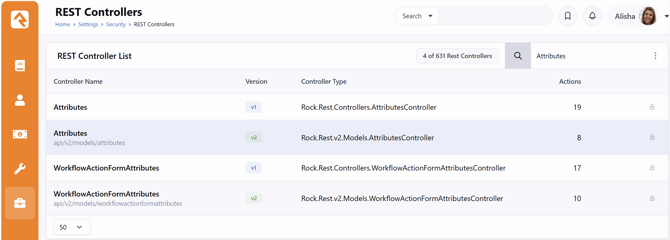
Attributes v2 — set Execute Unrestricted Write and add your user.
5. Add group members
Once the four controllers are set, go back and add group members so Safe Pathways can read your church's roster.
⚠️ Important
For Category and Attributes, set the permissions to Write / Read / Unrestricted / Admin. This is currently the only configuration that connects reliably — if your import comes back empty, check these first.
Part 3
Import your members in Safe Pathways
With Rock RMS configured, you're ready to bring your people in.
6. Run Rock Import
In Safe Pathways, select Rock Import. Choose how you'd like to filter, then find and import the members of your church.

Rock Import in Safe Pathways — filter and select the members to bring in.
Frequently asked questions
Where do I find my REST key after generating it?
Rock RMS displays the key only once, right after you click Generate Key. Copy it into Safe Pathways immediately. If you didn't capture it, generate a new key and use that instead.
Which controllers need permissions, and what level?
Four controllers: People v2 (Execute Unrestricted WRITE), Dataview (Execute Unrestricted WRITE), Groups v2 (View), and Attributes v2 (Execute Unrestricted Write). In addition, set Category and Attributes to Write / Read / Unrestricted / Admin.
My import isn't finding members. What should I check?
Confirm your API user has been added to all four controllers, that group members were added, and that Category and Attributes use the full Write / Read / Unrestricted / Admin permission set — this is the most common cause of an empty import.